Hey all!
If you liked my Crumbs in Bed website, check out TheHungryHungryRunner.com for some of the same old recipes and some NEW great recipes.
Thank you! I look forward to your visit!
-Alison
Hey all!
If you liked my Crumbs in Bed website, check out TheHungryHungryRunner.com for some of the same old recipes and some NEW great recipes.
Thank you! I look forward to your visit!
-Alison
Yep. You read that title right. I’m making butternut squash soup just as winter turns to spring on this lovely 50 degree day. Now normally I would be celebrating all things spring right now, but it occurred to me this week that I hadn’t bought one butternut squash all season long. Crazy right? So I bought one. I asked Paul how and he wanted it and he said soup, so who am I to disappoint? I suppose this will be (hopefully) a farewell dinner to winter. Yea, that makes sense.
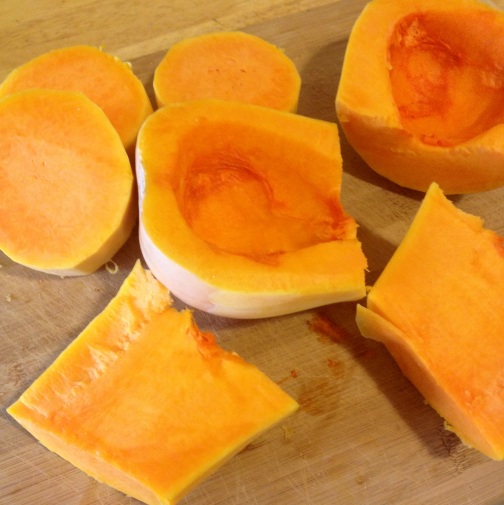
 Chop it.
 Roast it.

 Simmer it.
 Puree it.
Butternut Squash Soup
For the squash:
For the soup:
To Roast Squash:
Preheat oven to 400 degrees.
Place chopped butternut squash onto a tin-foil lined baking sheet. Drizzle olive oil, salt, pepper and rosemary over squash. Toss with tongs or your hands so all pieces are evenly covered.
Put in oven and toss with tongs intermittently. About every 10 minutes
Cook for 35 minutes, or until fork tender. Set aside.
For the Soup:
Heat olive oil in soup pot or dutch oven over a medium heat.
Add onions, celery and carrots. Sauté until onions have softened; about 5 minutes.
Add garlic, rosemary and thyme. Sauté for another 2 minutes.
Add broth to deglaze the pot. Add butternut squash and bring to a boil.
Once boiling, reduce the heat and allow the soup to simmer for 40 minutes.
Puree soup with immersion blender or a regular blender.
Add cinnamon and milk to soup. Add salt & pepper as needed.
 Eat it!
SPRING BREAK! Woo! The reason I’m so happy…and potentially the reason I just ate three cookies.
If you couldn’t tell already I am on my spring break from school and field placement and I am super excited about it! It’s been a very very hectic last couple of weeks and this break came at the perfect time.
I was so excited today to do all the fun things I’ve been wanting to do for weeks. And when I use the word ‘fun’ I use it lightly for all you folks out there, because what I was really doing was cleaning my apartment, running long lost errands and going grocery shopping. It’s the little things that make me smile I suppose.
Anywho, I’ve had this idea to make healthy oatmeal cookies for ages now. I had my mom send me her delicious oatmeal cookie recipe and I totally messed with it to create a healthier version. She would be appalled. But that’s okay.
So I must confess, these cookies did not spread. I assume from lack of oil/butter. That being said, although I was hesitant about their quality I was pleasantly surprised after tasting. So don’t let your eyes deceive you and give them a shot for a healthy dessert or on the go snack!


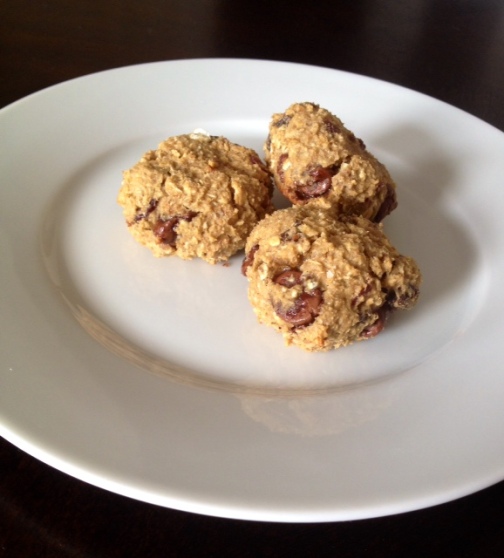
Trail Mix Protein Cookie
Preheat oven to 35o degrees.
Cream together applesauce, peanut butter, agave, eggs and vanilla until smooth.
Mix in separate bowl salt, baking soda, protein powder, and brown rice flour. Gently incorporate into wet mixture.
While mixing add oats into mixture.
At this time add in whatever “extras” you’d like. I added cranberries, chocolate chips, peanuts, and raisins. Mix until everything is distributed evenly.
Roll small balls of the dough and place on ungreased baking sheet. These did not spread so don’t worry about spacing them. Give them a small squish to give them a more “cookie-like” shape.
Cook for 10-12 minutes. (Mine needed 12) Enjoy!

I’ve never been a huge protein powder users. I experimented once with whey protein and it messed with my stomach so much I threw the rest away. Recently I’ve been giving it another go. I did a little research and found that the whey is often upsetting for a lot of people and an alternative option is a vegan protein powder. Well I did some more research and came across Sunwarrior products and contacted them for a sample. They were wonderful! I received a sample of all of their different vanilla protein supplements (flavor per my request) immediately after sending them an email. Awesome customer service. I really enjoyed the Classic Vanilla Protein Powder and bought some recently. I’ve been adding it to my smoothies but I was really interested in doing some baking with it. Today I did a little googling and came across a bare bones Blondie recipe that I altered quite a bit, and I absolutely love the result!
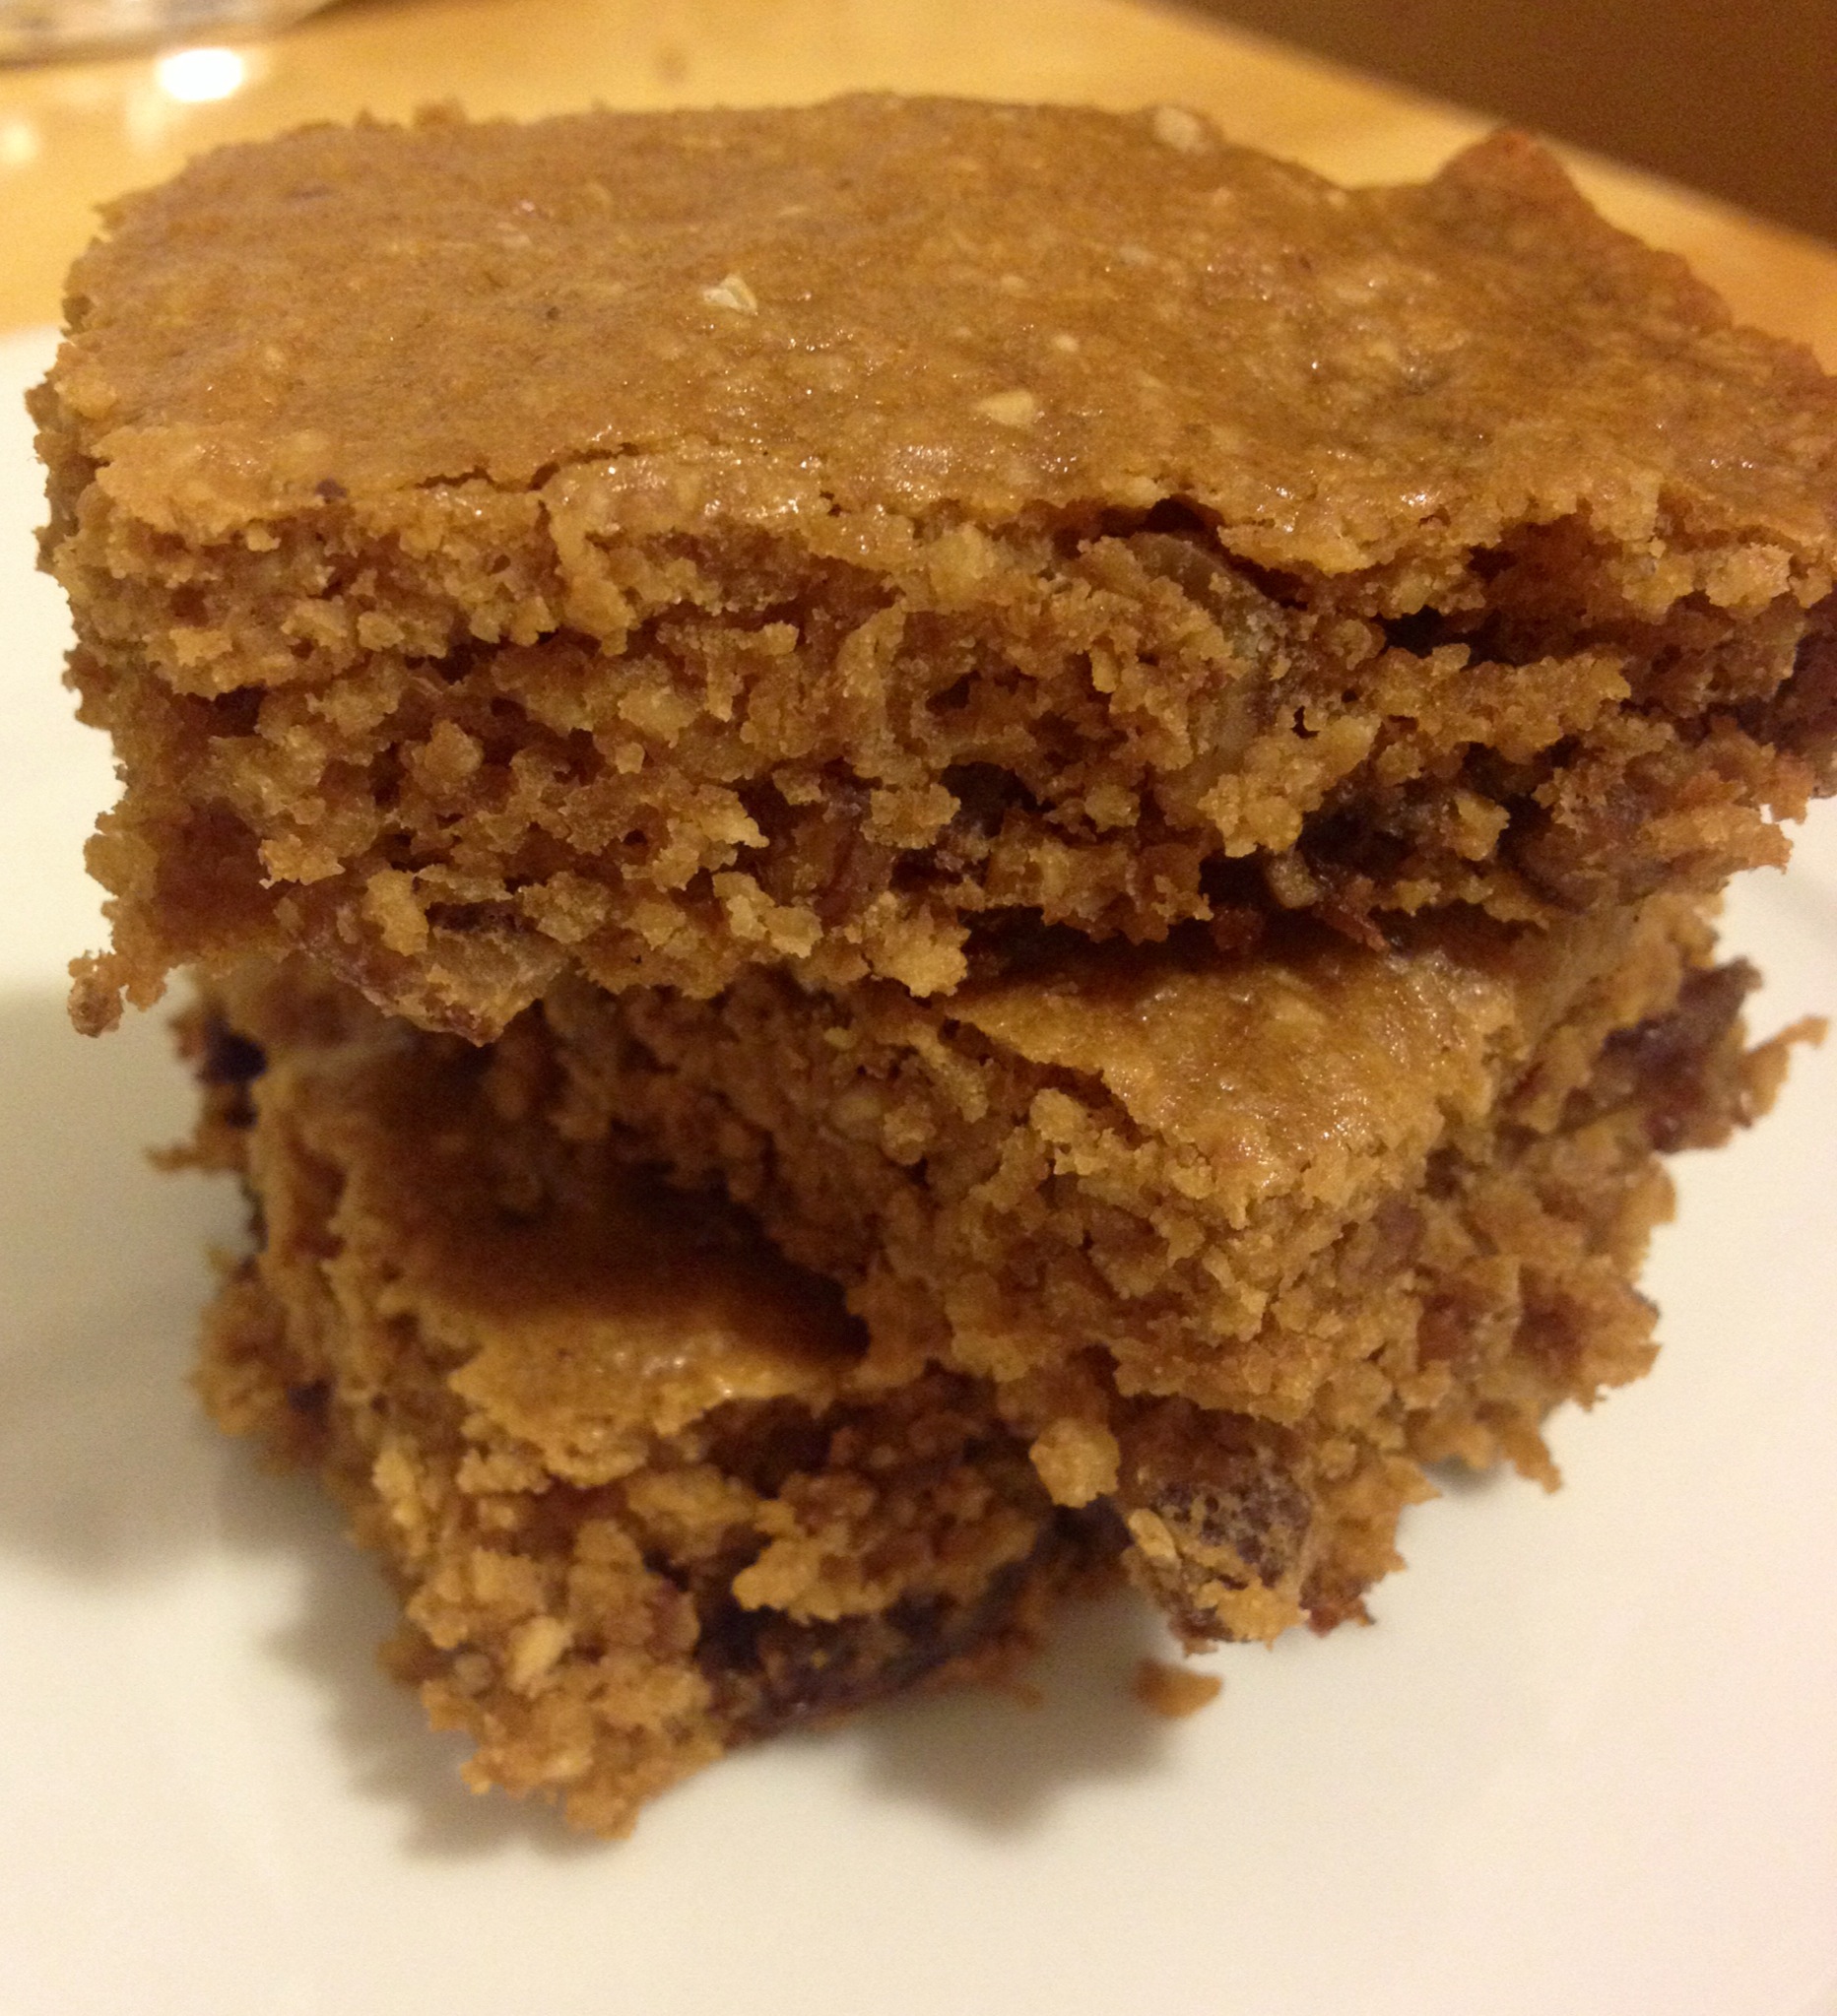 Blondie Protein Bars
Preheat oven to 350 degrees. Spray an 8×8 baking dish with cooking spray.
In a mixing bowl lightly incorporate dry ingredients.
In a separate bowl mix oil, applesauce, agave, egg, and vanilla. Pour wet mixture into dry ingredients and stir until incorporated.
If you want to add in nuts, chocolate chips, etc now is the time. Throw those goodies into the bowl and lightly incorporate them as well. Once completely mixed, pour batter into greased baking dish.
Cook about 25 minutes. I kept an eye on mine and they took about 27 minutes. Allow to cool completely and cut into squares. Enjoy!

***Suggestions welcome: Although the bars hold up pretty well, they are smidge delicate and I was wondering if anyone had any tips to firm them up a little. More agave/honey? Thanks!
Over Thanksgiving my aunt and cousins brought a really delicious and new appetizer to our house. When they opened the container and I laid eyes on what was inside, my face was smiling but my mind was saying “what the hell are those.” Well when they told me “Dates” I was even less enthused. HOWEVER, being open minded in every level of the food department I kept listening. The dates were filled with peanut butter and topped with confectioners sugar. Yep. And they were good!
Well, I have been racking my brain for some healthier desserts to satisfy our sweet tooth’s after dinner (or before) and these rang a bell. I made a few alterations to fit my lifestyle and I think they came out fabulous! I didn’t really use an exact recipe so bare with me as I put estimates below. These are super easy and super delicious!


PB & Chocolate Dates
Line a baking sheet with wax paper and set aside. Make room in freezer for sheet pan for later use.
Slice a small cut into each date so it is opened across the top. It will look something like a hotdog bun, if you will
I poured about 1/2 cup PB into a zip lock baggie, cut of the corner and piped PB into each date. Place date onto baking sheet and put in freezer for about 20-30 minutes, until PB has hardened.
In a microwave safe bowl (or using a double boiler) slowly melt chocolate. I heated mine in the microwave at 20 second intervals, stirring after each interval. Once chocolate is melted, use tongs to dip each date into the chocolate and place back onto the baking sheet. Allow excess chocolate to drip off before placing on sheet.
Top with a sprinkle of sea salt if desired. Place in freezer until hard.
Easy! Enjoy!
I am exhausted! Between my noisy neighbors, cracking heating pipes and my early morning run I barely have the energy to move this afternoon. Ugh. The great thing is even though I am barely able to peel myself off the couch this easy homemade yogurt recipe allows a lot of time to rest…for it and for you!
I love making yogurt and have perfected it for my own taste and accommodations. Feel free to play around with different fat contents but I keep my at 0% with skim milk and a 0% fat yogurt starter.


Yep, I use a meat thermometer


Fat-Free Greek Yogurt
I’m headed into the final days of my winter break and boy has it gone fast! Unfortunately for me…and my body I haven’t been the most productive or healthy person these last couple of weeks. I blame the holidays! (Because I need to blame someone right…?) Even with my best intentions its been hard not to oversleep a smidge, go light on the workouts and forget some of my usual eating habits. That being sad, I’m still feeling in pretty good shape, I’m just sad to say I’m in need of a good ole dose of my regular routine *sigh.*
Today we have a winter storm headed our way, “Hercules” if you will. This was the perfect opportunity for me to get up early, workout, clean and cook! A few things I have been slacking on for sure….
I cozied up in our broiling apartment and made some Chorizo Bean Soup and Southwestern Quinoa Casserole. Woop! Healthy New Year here we come!
Spicy Chorizo Bean Soup
Heat oil in dutch oven (or soup pot). Add onions and saute on medium for about 4 minutes. Add garlic and saute for another 2 minutes.
Add basil, oregano and rosemary and saute until fragrant. Add all beans, kale, tomatoes and broth to pot and bring to a boil. Once boiling add rice wine vinegar and red wine vinegar.

My kale is overflowing! Next time I’d recommend adding this to the pot first.
Allow to simmer for 15 minutes. After 15 minutes add chorizo and continue to simmer for 30 minutes.


Optional: Once soup has simmered use immersion blender to lightly blend some of the soup. This step is optional. I like it somewhat blended to make it a thicker soup, but with some texture. Taste the soup and add salt as needed.

Have a happy and healthy new year!
First order of business….Happy Halloween!!!
Second order….I know I haven’t posted anything in awhile but grad school has got me totally busy! Not only do I have little to no time to blog, I barely have time to cook! I know! Awful right?
However, I’ve been wanting to make this pumpkin smoothie all week as an ode to Halloween. I (strangely) have some extra time before work so I figured I would share. It’s one of my favorites and can definitely be enjoyed throughout the year, no matter what season!
Pumpkin Smoothie
Throw it all in the blender and blend! If it’s too thick add a little more liquid: milk or water. Enjoy!

I never buy pre-made freezer meals! I hate them.
Well, I lied I do buy them sometimes….for Paul. I would rather make my lunch. Pay half the price. Know what’s in it. Etc. Paul on the other hand would rather eat a bag of pretzels for lunch than make a real one. Yes, this has happened.
So, every so often I will buy him those Evol, Annie’s or Whole Foods 365 Burritos. He loves them. I think they are a gigantic waste of money. They often range between $2.50 to $4.00/burrito, depending on the kind or if there are sales. Crazy. So I decided I would try my hand at making my own! It was a little time consuming but on a rainy Sunday afternoon (not to mention move-in day in Boston…eekk!) I didn’t mind and although I didn’t calculate the price, I feel confident that I am paying a lot less for these homemade babies!
Freezer Burritos
Cook rice according to package. Set aside.
Saute onion and garlic in olive oil on medium heat. Cook until translucent and fragrant. 
Add rice to onion and garlic. Add diced tomatoes. (I only used half a can with half the sauce but feel free to add more) Cook on medium heat until most of the liquid has evaporated.
Remove from heat. Add cooked and shredded chicken, as well as black beans to the rice. Add chili powder, salt and pepper. Incorporate well and set aside.
Wet a paper towel and place tortillas on a plate. Cover tortillas with wet paper towel and heat in the microwave for 15-25 seconds until warmed. This makes them easier to fold.
Spoon equal parts of the rice mixture onto each tortilla. Top with shredded cheese and roll each tortilla up. Cover in tin foil or plastic wrap and freeze.


The verdict? Paul told me these outranked any of the store-bought burritos I have ever bought. Success! He microwaved it for 2-3 minutes, but this will vary from microwave to microwave, Ours is pretty pathetic…
It’s pumpkin season people! September! The very very very cusp of fall and I plan to take full advantage….even if it was 80 degrees out today. Whatever. I LOVE fall, as do many New Englanders. It is my favorite season without a doubt, and I love how it subtly leads us into the winter holiday season. Although, I do NOT love Winter…like most New Englanders.
Anywho, I eat pumpkin all year round because it’s absolutely fantastic for you. I’ve been on a forced pumpkin hiatus as Whole Foods, my go-to pumpkin haven, has temporarily (or permanently?!) stopped carrying their 365 Canned Pure Pumpkin. I’m super annoyed by this situation, and I’ll tell you why. I JUST discovered this beauty long enough to buy just 2 sad cans before it disappeared! Get it somewhere else? No. Whole Foods 365 is the cheapest I’ve ever been able to find it, I think about $1.69/can? So I boycotted it from other stores.
That is until….TODAY! Woo. I strolled into Shaws today…I never stroll into Shaws, I hate Shaws. But that’s a rant for another day…. Anyways, I strolled in looking for a particular item (which they didn’t have) and stumbled into the baking aisle and what did I see?! Shaw’s brand canned pure pumpkin. Could it be! And marked down to $1.29/can. Yes! I bought 4 cans. I may have to go back.
Rant Over. Pumpkin Oatmeal Cookies. ButterLESS, OilLESS, GuiltLESS. Check it out.
WARNING FOR COOKIE SNOBS: This cookie will not have your “average” cookie texture. It’s a bit denser but the flavor is great. Definitely a great guiltless dessert you won’t find yourself regretting.
 Pumpkin Oatmeal Cookies
Preheat oven to 350 degrees. Line a baking sheet with wax paper.
Combine pumpkin, egg, agave and vanilla well. Set bowl aside
In a separate bowl combine flour, oats, sugars, baking powder, baking soda, flax, salt, cinnamon, nutmeg and cloves. Lightly mix.
Slowly incorporate the dry mix into the wet mix. Once nearly mixed add in chocolate chip and walnuts. Finish incorporating. Taste test and add more spice as desired.
Scoop even spoonfuls of batter onto the baking sheet. Press dough down and form into a cookie shape.
*Because there is no oil/butter the cookies will not spread naturally. It is very important to form the cookies prior to baking.
Bake cookies for 14 minutes or until they are no longer smooshy on the tops. Remove from tray and cool on cooling rack.


